1 The one rule
Same spot. Same frame. Same height.Pick a landmark you can find again: a door, a drain, a pillar, a parking stall number. Stand in the same place for the after, hold the phone at the same height, pointed the same way, no zoom. Both photos portrait, or both landscape. That is the whole trick, and it is the one most people skip.
Why it mattersA before and an after taken from two different places are two photos of a site. Taken from the same place they are one photo of a change, and the client sees the change without reading a word.
 Before
 After: same spotBefore
 After: not this
In the app: the Before thumbnail sits right beside the After slot on the service card. Glance at it before you shoot the after and line yourself up on the same landmark.
2 Light is the difference
Why it mattersMost of our work starts before the business opens, in the dark or at dawn. A dark before photo shows nothing, so the after has nothing to beat. Light is the cheapest upgrade you can make to a photo.
 5 am, no light
 Same spot, headlamp on
Do
- Carry a headlamp. Point it at the surface, not at the lens. From the side, low, is best: it throws small shadows and shows every bit of grit and grime.
- Turn on what's there: lot lights, canopy lights, the hallway switch. Ask the site contact where the switch is.
- Use the phone's flashlight if that's all you've got: a crew mate holds it from the side while you shoot. Or prop the second phone on a bucket.
- Use Night mode if your phone offers it, and hold very still.
- Shoot with the light behind you or beside you.
Don't
- Shoot into the sun, into a lit window, or into a headlight. Everything in front goes black.
- Use the camera flash on glass, stainless steel or wet floors. It bounces straight back as a white blob and hides the dirt.
- Shoot the after in better light than the before "because it's daytime now". If the before was lit with the headlamp from the left, light the after the same way. Same light, same spot.
3 The before: show the problem
Why it mattersThe before photo is the reason the client is paying. The worse it looks (honestly), the better the after looks. A before that hides the dirt is a before that wastes the after.
 Close: the worst spotWide: where it is
Do
- Find the worst of it first. Walk the area for thirty seconds before you shoot. The oil patch, the gum field, the grease streak by the dumpster, the black corner the sweeper never reaches. Those are your before photos.
- Two shots per problem: close on the dirt, then wide to show where it is. The close one sells, the wide one proves.
- Shoot floors and lots from a low angle, across the surface. Dirt reads better across a floor than down on it.
- Put something in the close shots for scale when the mess is big: a glove, a boot, the edge of a cone.
- Wipe the lens on your shirt first. A greasy lens is the number one cause of hazy, flat photos.
Don't
- Tidy anything before the before. Not a sweep, not a kick of the leaves. The before is the site as you found it.
- Shoot only the wide shot. From ten metres away every floor looks fine.
- Shoot one before for the whole site. One per problem area, and the app keeps them in order so the afters line up.
- Make it worse. Never move a pile or add to a mess for the camera. The client was there yesterday.
4 The after: prove it
Why it mattersThe after is the photo the client signs under and the one that goes on the company's page. It has to match the before and it has to look finished.
Do
- Go back to the same spot for each before, in the same order. Landmark, height, angle, orientation.
- Let it dry. Wet concrete, pavers and asphalt photograph dark and look dirty. Shoot the dry section, or come back to the first area at the end of the visit when it has dried.
- Clear the frame: hoses, wands, cones, buckets, rags, the truck. Thirty seconds of moving gear turns a work-in-progress photo into a finished one.
- Check it on the screen before you move on. Blurry, dark or crooked: shoot it again now. You can't come back.
Don't
- Shoot the after from the truck on the way out. Walk back to the landmark.
- Include people. No crew in the shot, no customers, no one walking through.
- Zoom in to crop out the bit you didn't finish. If a corner isn't done, finish the corner.
- Use a filter or edit the photo. Straight out of the camera, every time. The app does the resizing.
The money shot: half done
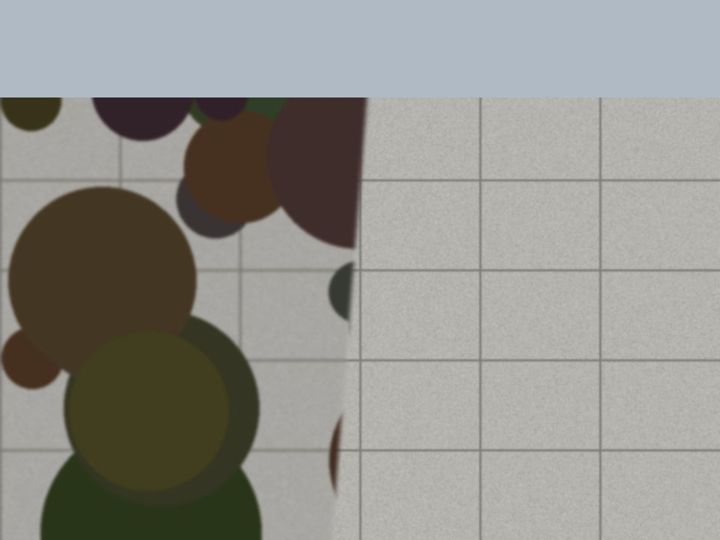 Half dirty, half clean, one frame
5 Holding the phone
 Blurry, with flash glareStill hands, light from the side
- Wipe the lens. Shirt, sleeve, anything. Every time you take the phone out of a pocket.
- Both hands, elbows against your body. Phones blur because hands move, not because phones are bad.
- Tap on the dirt. That sets focus and brightness on the thing that matters, not the sky.
- Wait for the focus box, breathe out, shoot. Then look at it. If it isn't sharp, shoot again before you move.
- Step closer instead of zooming. Zoom on a phone is a crop; it throws away detail.
- Walls, doors, windows: portrait. Floors, lots, roofs: landscape. Whichever you pick, use it for both photos of the pair.
- Glass and steel: stand off to the side so you and your headlamp aren't in the reflection, and keep the flash off.
Three good photos beat ten blurry ones. Four pairs is a well-documented job. Twelve pairs of the same stain is a phone full of nothing.
6 What never goes in a photo
Never
- Faces. Customers, staff, the public, your crew. If someone walks in, wait.
- Licence plates, unit numbers on doors, name plates on desks.
- Paperwork, screens, whiteboards, anything with a customer's information on it. Angle away or move it (and put it back).
- Inside private offices, washrooms in use, residential units without the site contact saying yes.
- You. No selfies, no reflections in the glass, no shadow of you across the floor (move so the light is beside you).
Fine
- The client's building, signage and branding, when they tick the photo consent box on the certificate. The office decides what goes public; you just shoot the work.
- Your gloves, boots or a cone for scale in a close shot.
- A short walk-through video, under a minute, phone steady, narrating what you see. Same rules as photos.
Photos only count through the app. A photo texted to the office, WhatsApped to a crew mate or left in your camera roll is not on the certificate, not in the client's folder and not on your company's page. Shoot it in the app or it didn't happen.
7 The shot that sells it, by service
| Service | Before | After | The one that sells it |
|---|---|---|---|
| Pressure washing | Low across the surface, raking light. Gum, oil, moss, black edges. Close then wide. | Same spot, dry. Shoot the first area last if it's still wet. | Half-done line across the frame. |
| Window cleaning | From a 30–45° angle so streaks, spots and film catch the light. Not square-on (it reflects you). | Same angle, same pane. Flash off. | One pane cleaned, the next one not, in one frame. |
| Parking lot sweep | Curb lines, corners, drains, cart corrals, the spot behind the dumpster. Close on the debris. | Same corners, same curb lines. | The debris pile you collected, next to the clean corner it came from. |
| Graffiti removal | Square-on, whole tag in frame, then a close on the thickest paint. | Same framing, same distance, wall dry. | The pair itself. Match the frame exactly. |
| Gutter cleaning | Phone held above the gutter looking down the run. Close on the blockage and the downspout. | Same run, same angle, water flowing if you can. | The pile of muck on the tarp next to the cleared run. |
| Landscaping and grounds | Wide from a fixed point: the gate, the corner of the building. Close on the problem (weeds, edges, dead spots). | Same fixed point. Tools and bags out of frame. | A clean edge line, close, with the lawn behind it. |
| Mobile detailing | Interior: driver's seat from the open door, mats, door jambs, cup holders. Exterior: wheel, lower door. | Same door open, same angle. Plate covered or out of frame. | The wheel, half cleaned. |
| Junk removal | Wide, showing the whole pile and the room or yard around it. | Same spot, empty, floor swept. | The loaded truck, then the empty space. |
| Snow removal | Depth against a curb, a wheel or your boot; the blocked entrance. | Same entrance, cleared to pavement, salt down. | The cleared path with the snow bank beside it. |
✓ Before you tap Certificate
- Every service card is green: before and after.
- Every after is from the same spot as its before.
- The worst area has a close shot and a wide shot.
- Nothing wet, nothing blurry, nothing dark. Retakes done.
- No faces, plates, paperwork or crew in any photo.
- Gear, hoses and cones are out of every after.
- One half-done shot if the service allows it.
- All the little dots are green (sent) or orange (waiting for signal), none red.
RememberThree places see these photos: the client on the certificate, the office in the folder, and future customers on the company's page. Shoot every pair like the company's next job depends on it, because sometimes it does.
‹ Back to the app training